Fitting a Digital Plug Ready - F1
Digital Plug Ready - F1
Fitting an F1 DPR Digital Chip in to an F1 car is simple enough but does require some preparation of the wires already inside the car.
It is not necessary to remove the body from the chassis. All the preparation can be done from the DPR module door.
Step 1
Unscrew the blank DPR plate and disconnect it from the plug on the wiring loom.
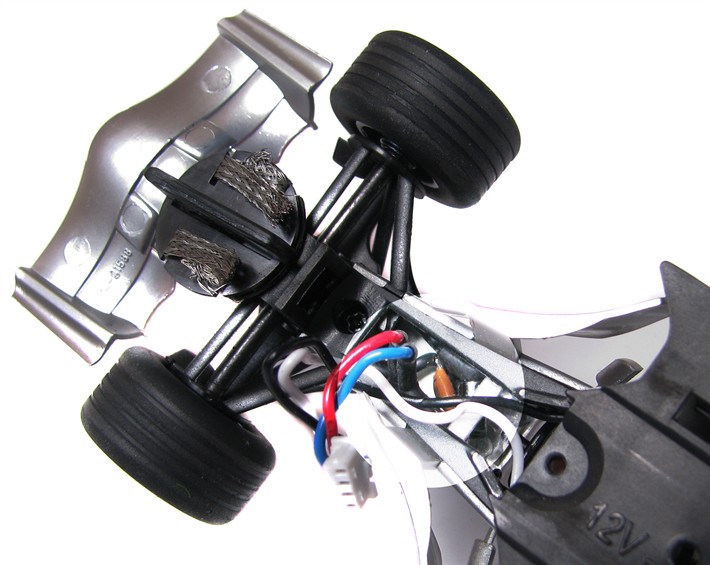
As you will see, it is not possible to simply put the DPR plug straight in to the chassis due to the wires within the nose of the car obstructing the DPR chip.
Step 2
With care, relocate the wires so that the hold the brown capacitor and the black ferrite choke are moved into the cavity in front of the steering wheel.
This will leave room for the plug/socket to fit in the front section and, importantly, a cavity for the round metal transistor on the DPR plug to fit in the 'V' shaped area immediately in front of the fixing screw.
Step 3
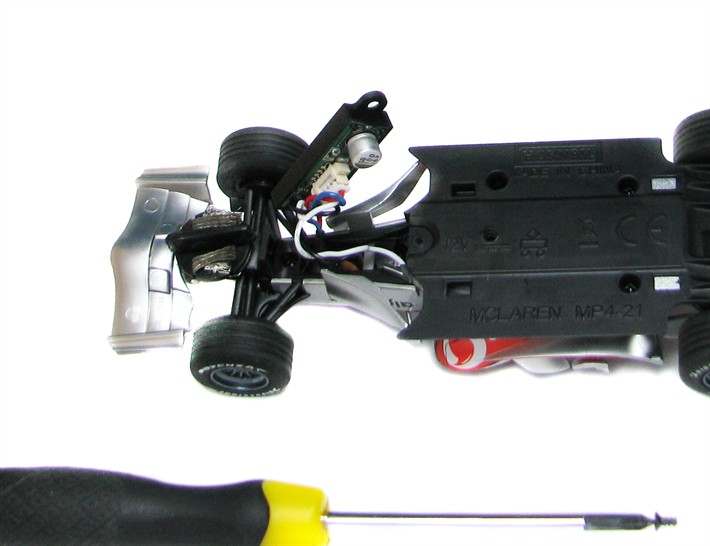
Plug the DPR chip in to the DPR socket on the car. Take care as the plug only fits one way round. On this example (see picture), the red wire on the plug is situated nearest the round metal transistor on the DPR chip.
Step 4
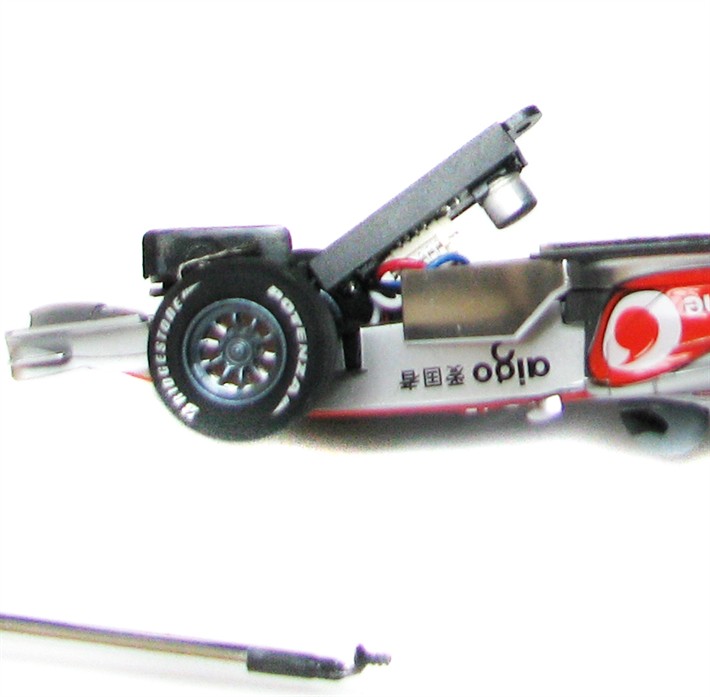
Check to ensure that the wire are not obstructing the fitting of the DPR chip and ease the wires and the DPR chip into the cavity.
The DPR should fit quite freely in to the cavity without undue pressure. Fit the fixing screw.
Step 5
The DPR chip will be set to ID 1 by default. Put the car on a Digital track. Set the ID as you require or simply accept ID 1. Test the car.